🚀 Getting Started
Welcome to FSCharter! This guide walks you through everything you need to start flying. By the end, you'll have the plugin installed, understand how to navigate the platform, and be ready to complete your first flight.
Installing the Plugin
Before you can fly, you'll need the FSCharter plugin installed in your flight simulator. The plugin connects your simulator to the FSCharter network, tracking your flights and handling passenger operations.
Once you've created an account, log in and click on the Download Plugin button in the bottom left of the page. Download the correct pluging for your simulator and install it as-per the instructions included in the download.
X-Plane Users: Once installed, launch your simulator and you'll see the FSCharter panel available in the plugin dropdown at the top of the X-Plane window. See here for more information on installing the X-Plane plugin.
MSFS Users: Once you've installed the client, open it from the start menu. FSCharter runs as a standalone clien for MSFS and P3D - not inside the simulator. See here for more information on installing the MSFS & P3D SimConnect client.
Open the settings panel and log in with your FSCharter credentials. In the plugin settings, ensure the Environment is set to Release - this connects you to the live network. At this point, you should see that you have no active job.
Navigating FSCharter
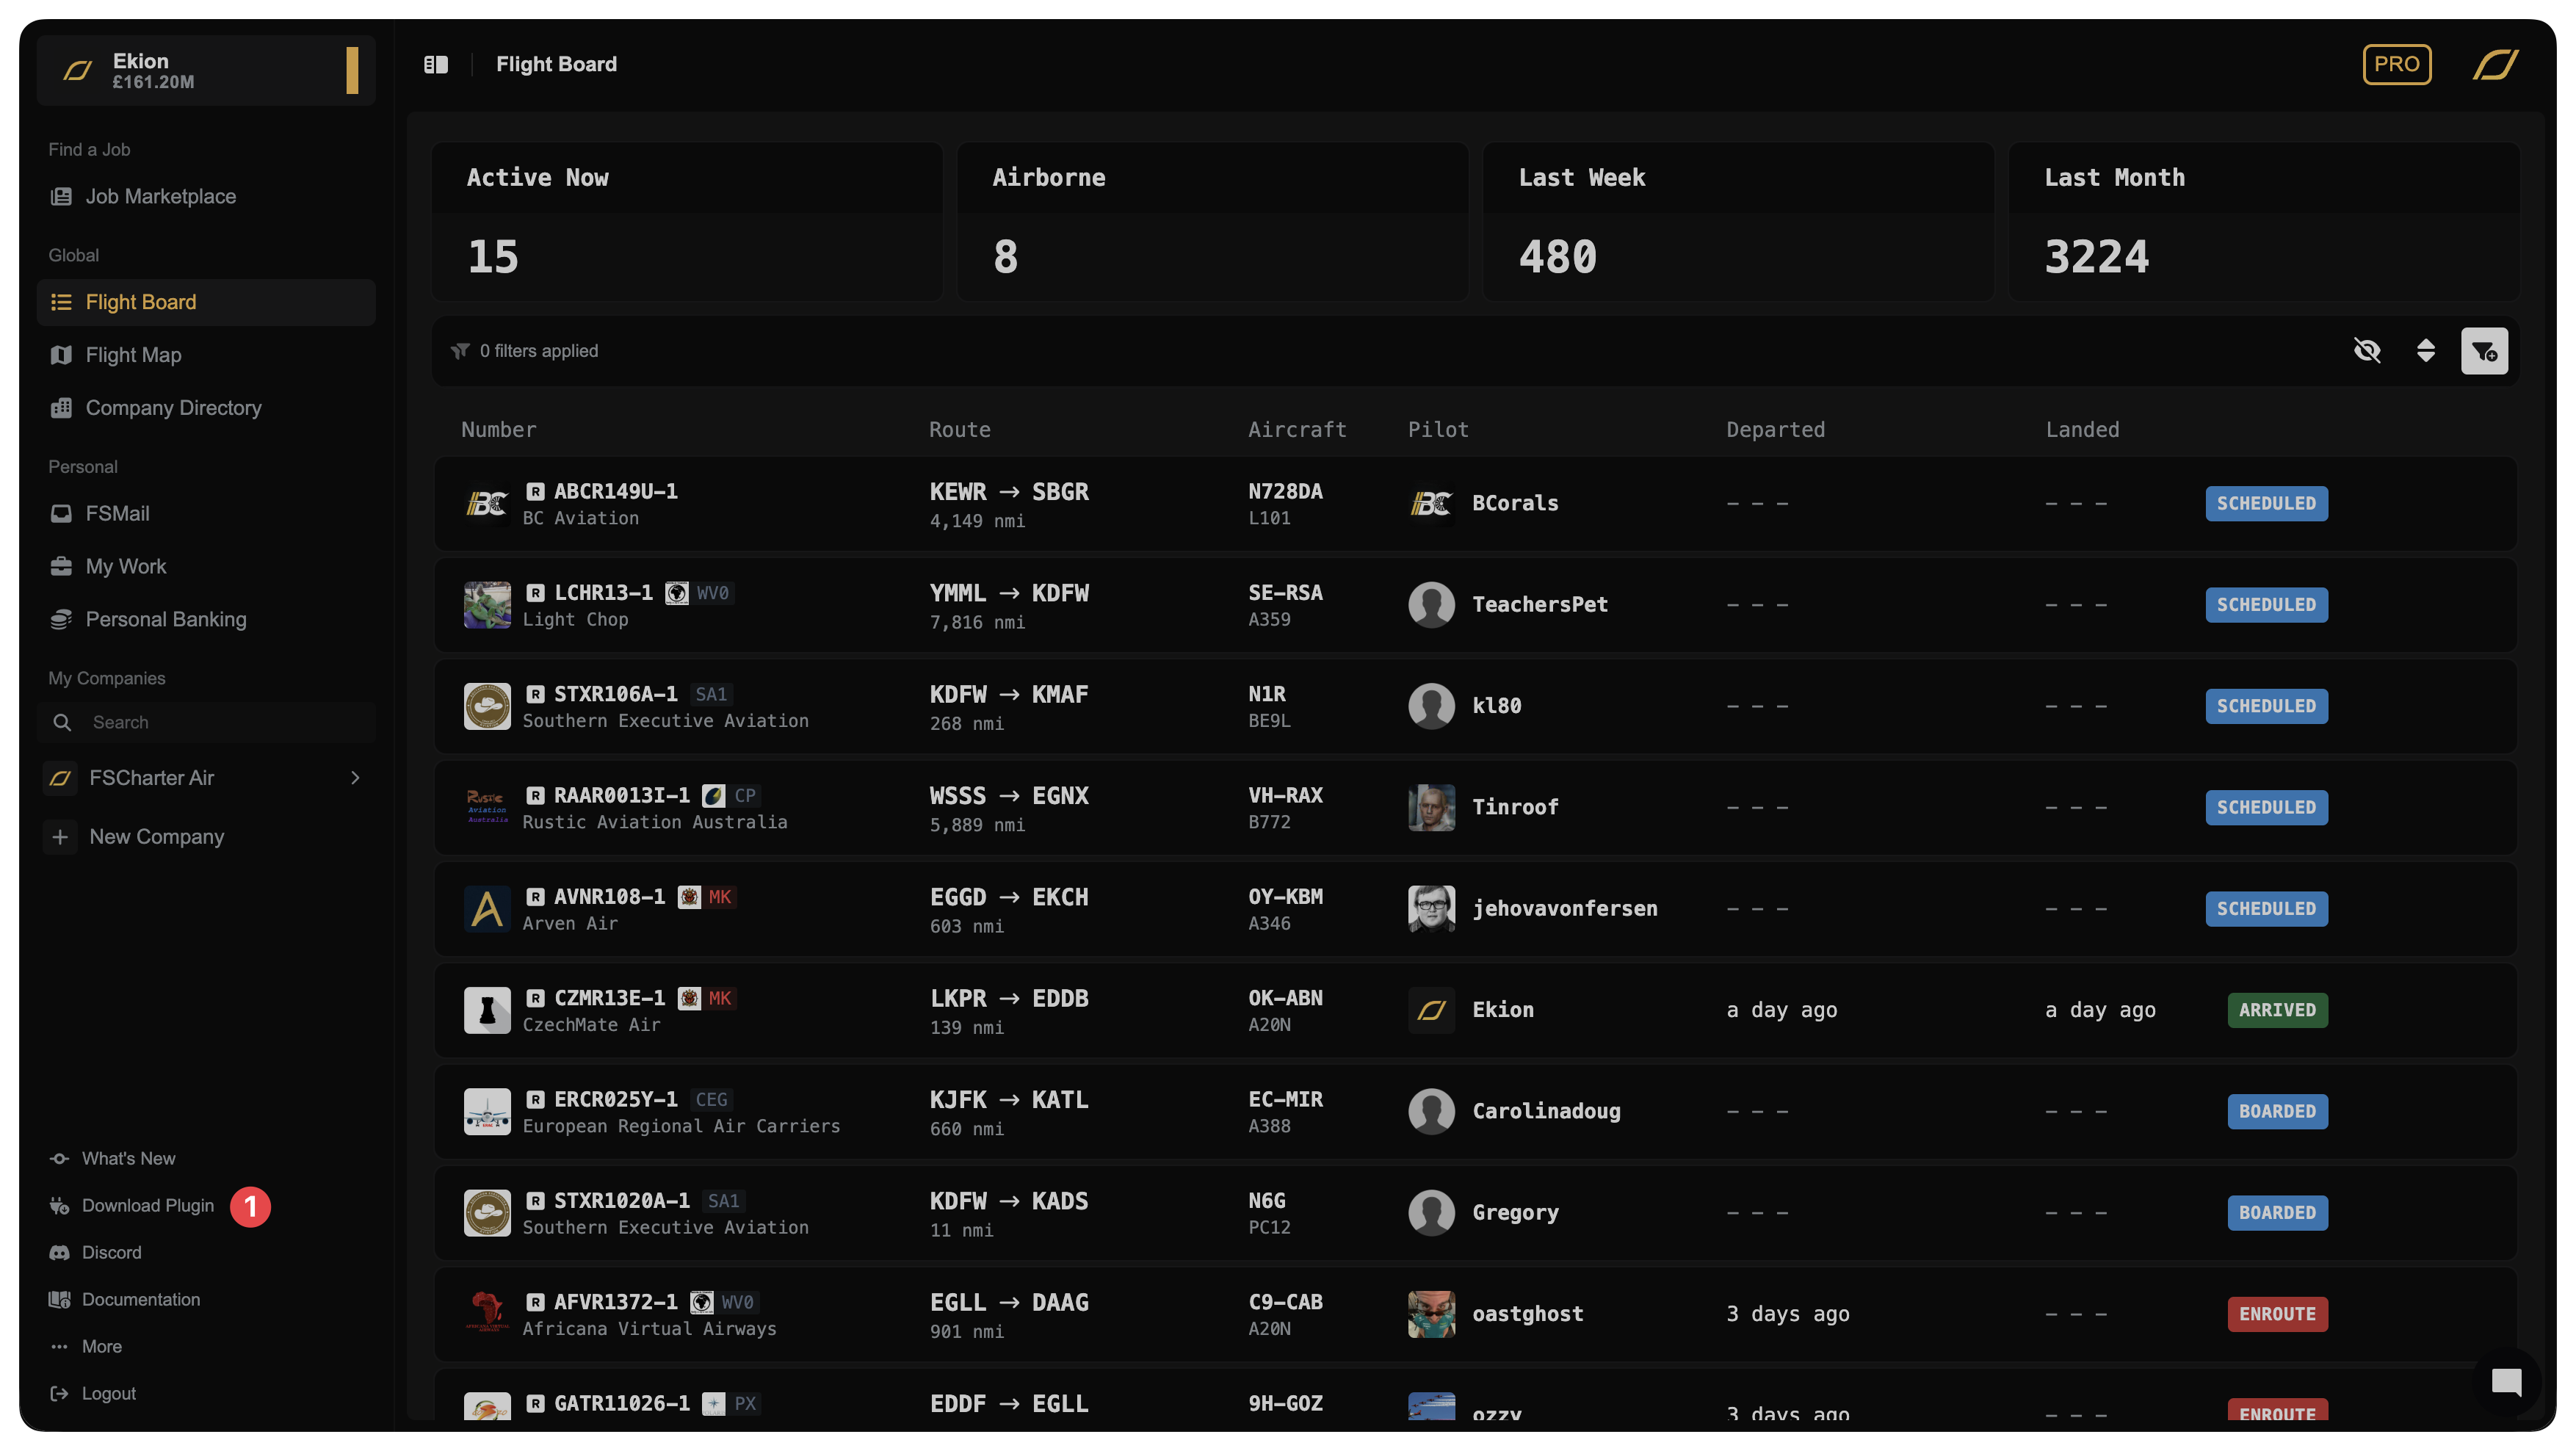
The FSCharter website is your command centre for finding jobs, managing your career, and tracking your progress. The left sidebar contains all the main navigation.
The Job Marketplace 1 is where you'll find flights to fly.
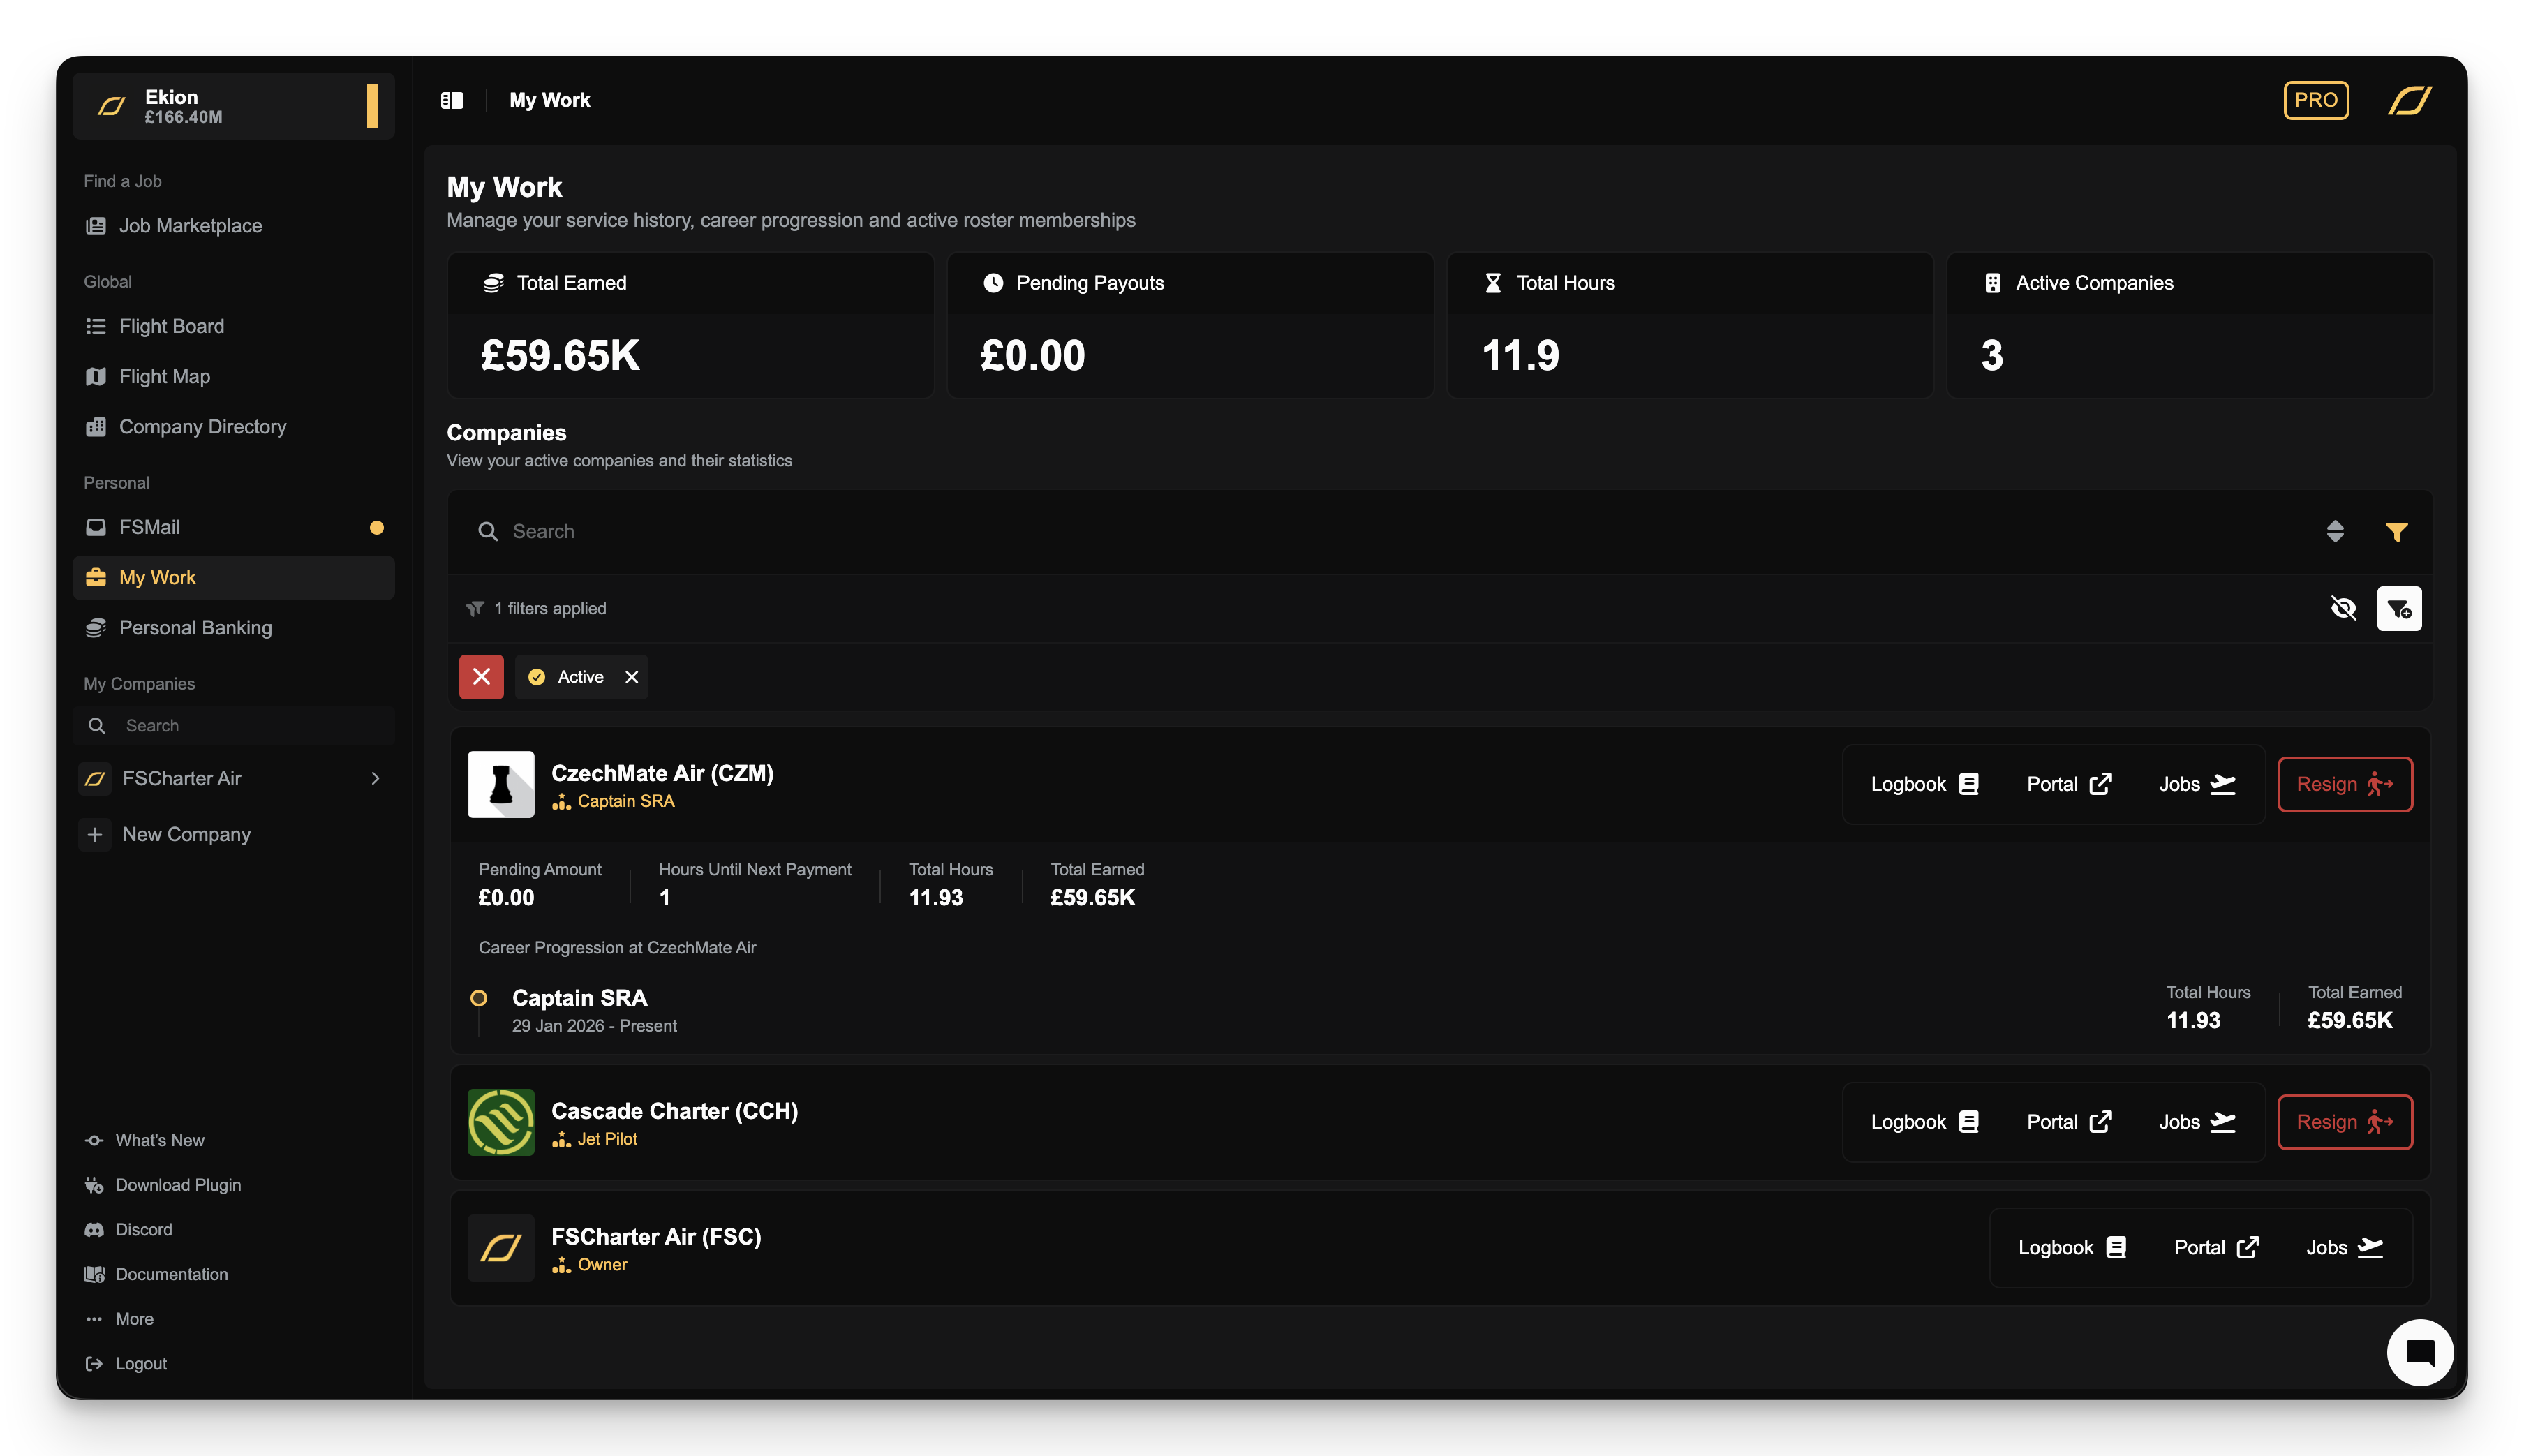
My Work 2 shows your roster memberships with companies
Clicking on your username in the top left 3 will show you your personal profile, where you can access your logbook, global rank, lifetime statistics, achievements and settings.
If you join companies as a manager, they'll appear in the sidebar with their own management sections 4. Don't worry about companies yet - you can start flying for others without any prior setup.

Finding Your First Job
The Job Marketplace displays all jobs available to you across FSCharter. This page shows you all jobs that you're eligible for upfront, even if you don't yet have an active roster membership with the company.

Open the Job Marketplace from the sidebar. The first time you open the Job Marketplace you will be presented with the Job Search Assistant. This guided wizard helps you find suitable flights based on how far you want to fly, how long you want to be airborne, and what aircraft you'd prefer.
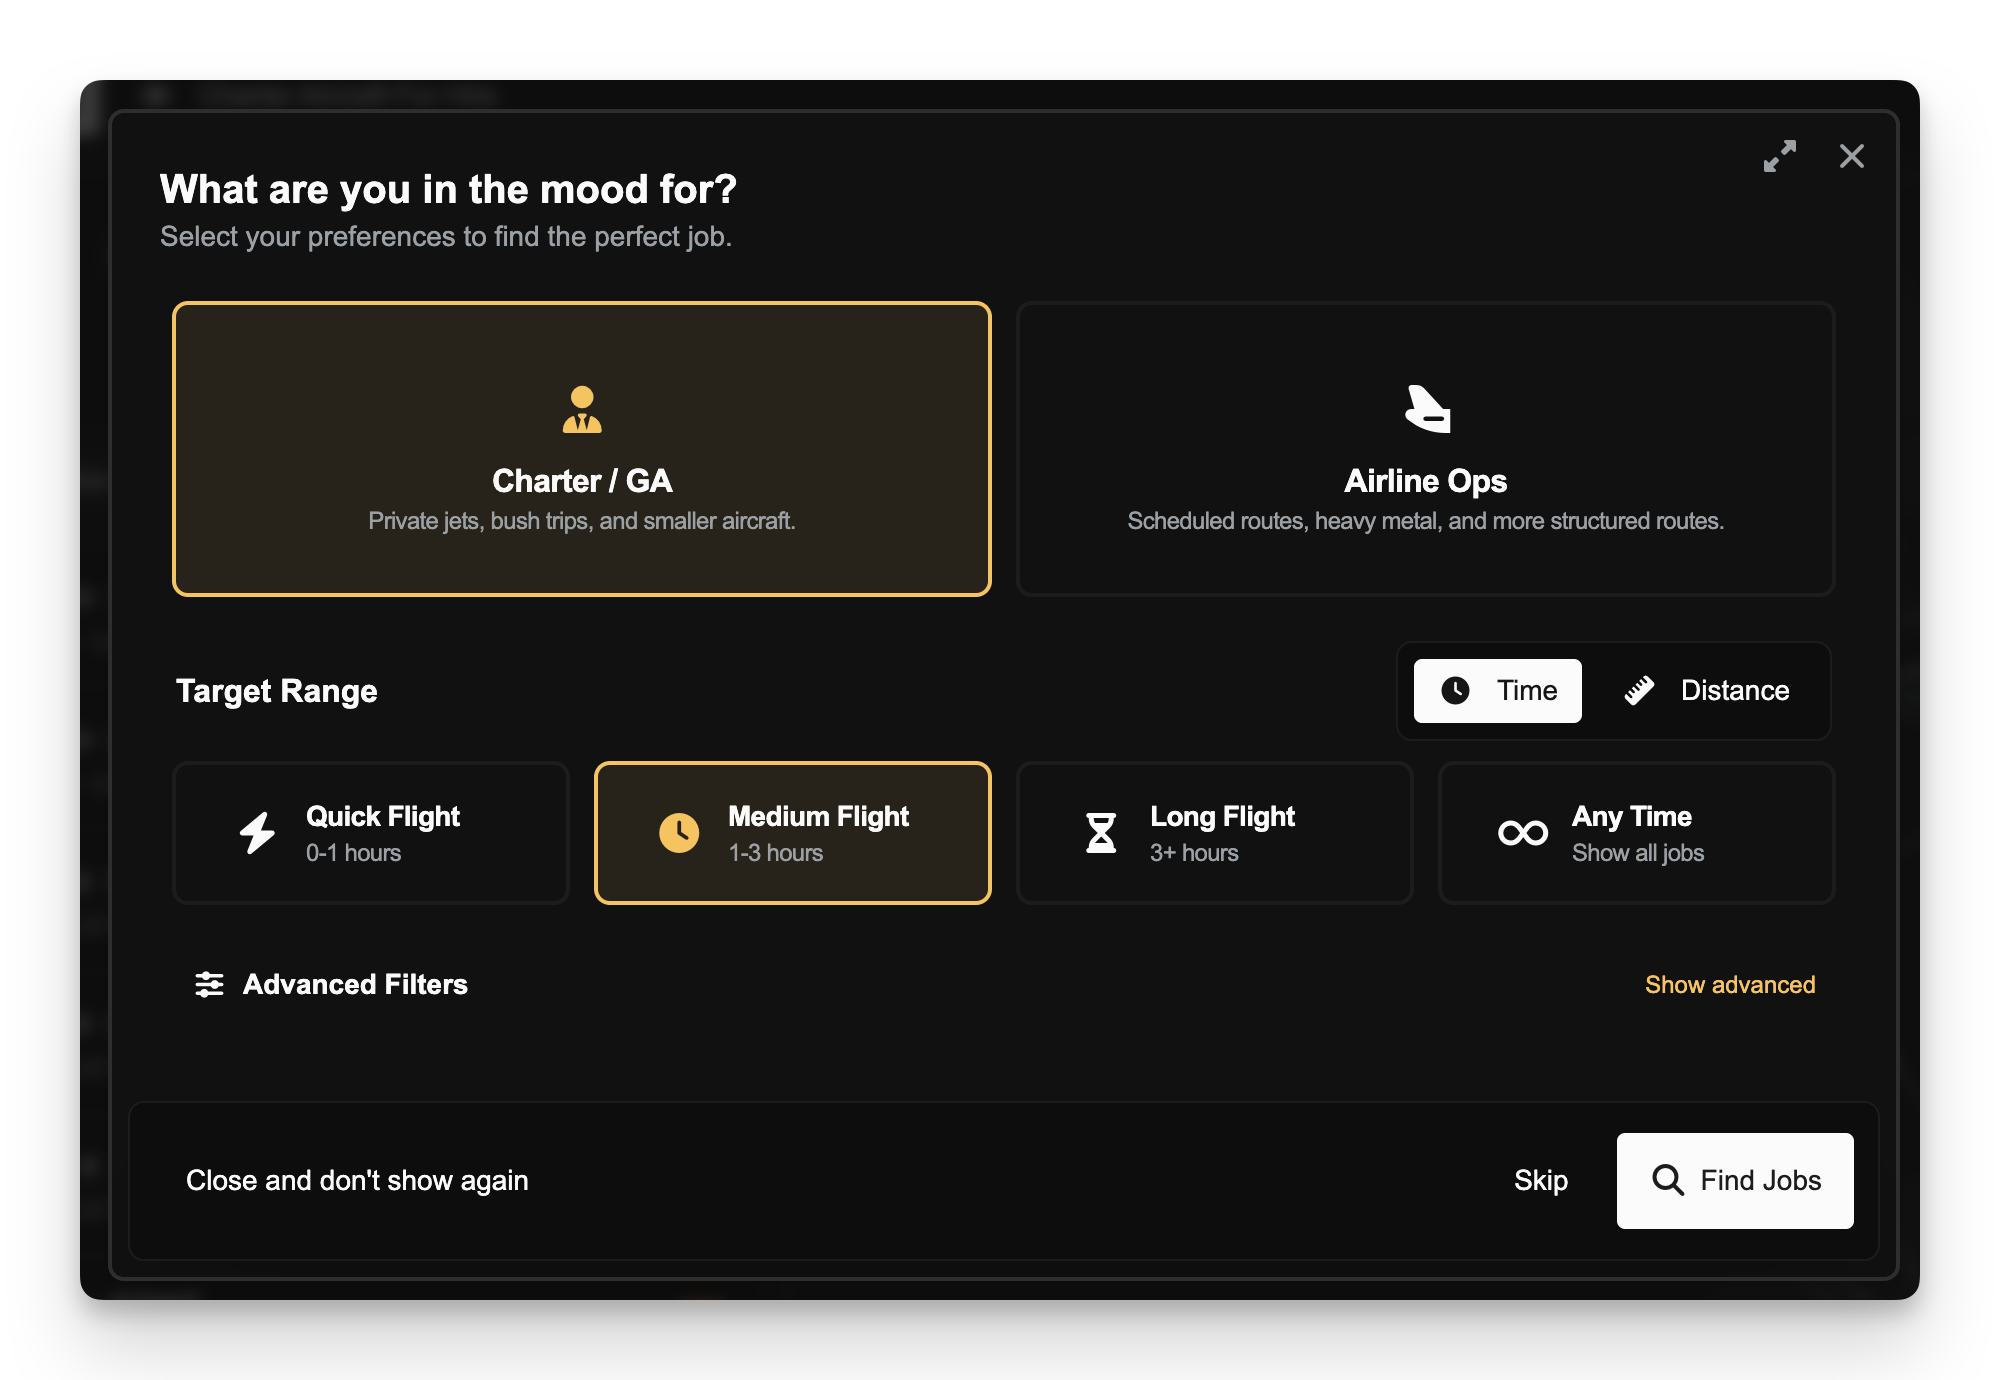
Feel free to use it to filter your jobs further or close it to see all jobs.
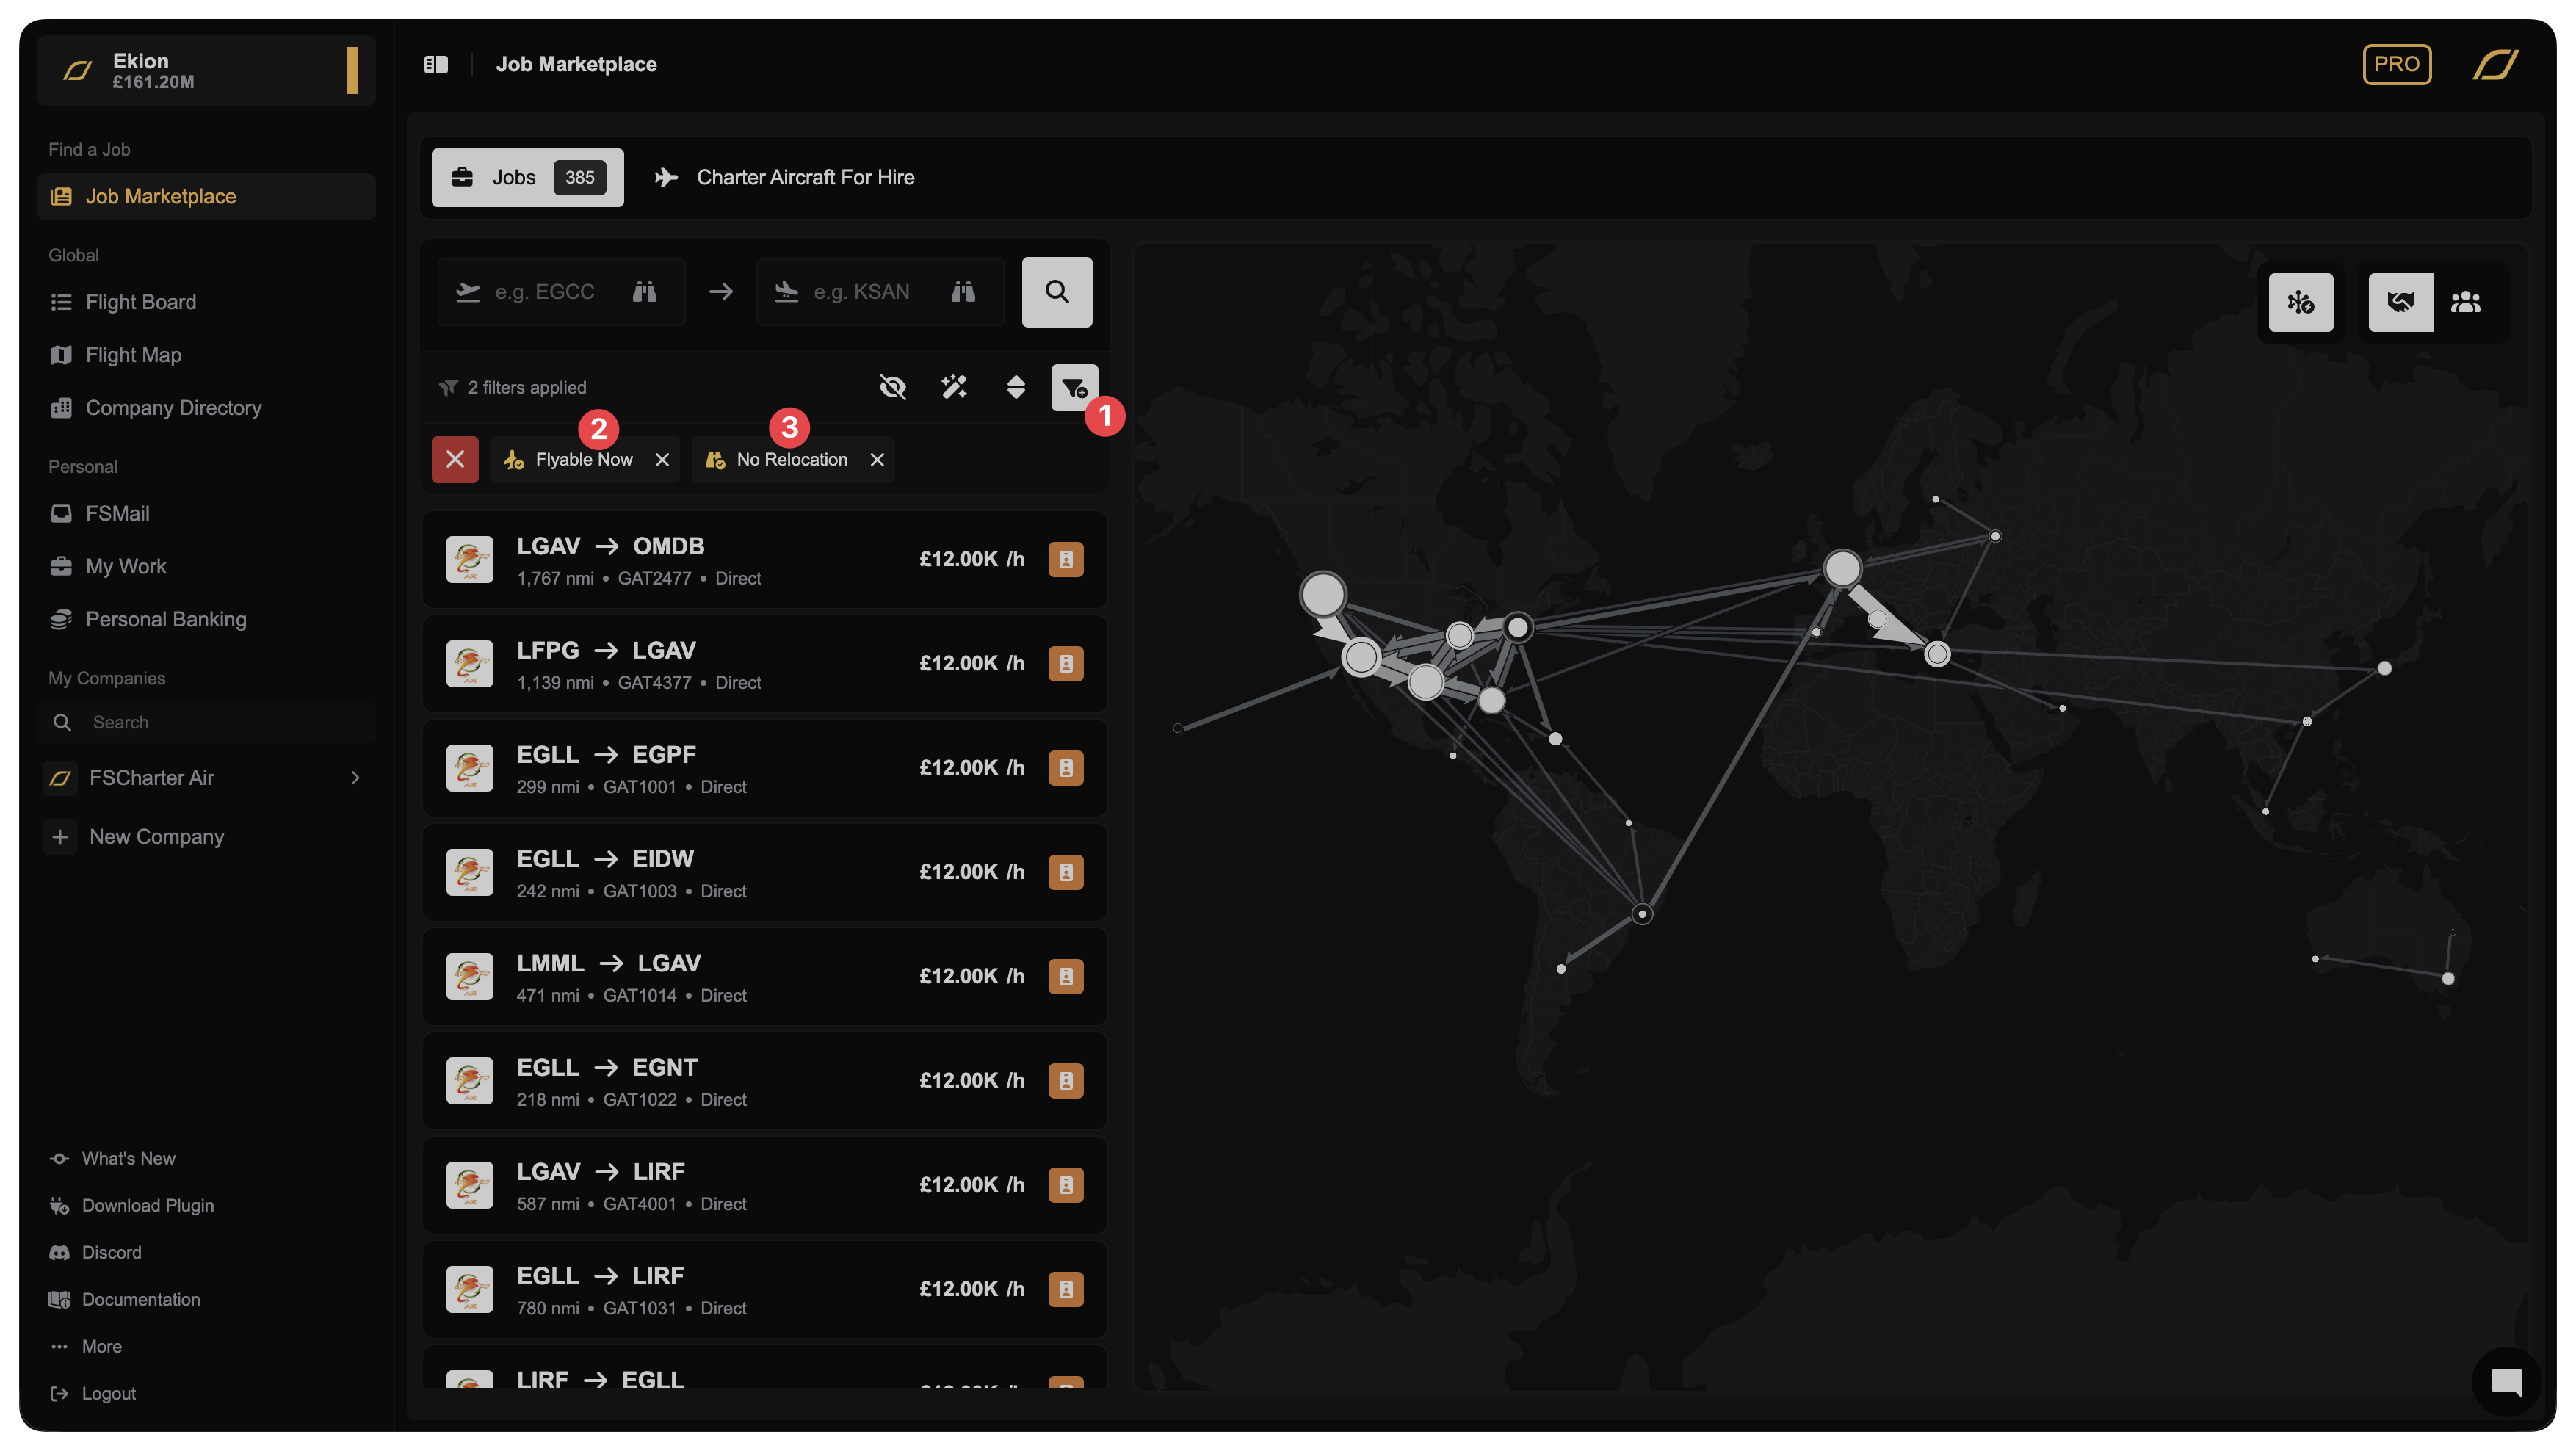
You'll see a list of jobs on the left and an interactive map on the right. Each job shows the route, operating company and other details. Use the map to pan and zoom, exploring jobs in regions that interest you.
Alternatively, use the white Add Filter button 1 to narrow down jobs. Filters are organised into sections (Popular, Aircraft, Route, and Company) making it easy to find exactly what you're looking for.
By default there are two filters automatically applied to the Job Marketplace.
Flyable Now: 2 This filter only shows jobs that you do not need to wait for approval to fly. If a job could only be flown by a rank that required the company managers to manually approve you, it would not show. You may remove this filter if you'd prefer to see more jobs and don't mind waiting.No Reloation: 3 This filter hides jobs that would require you to first fly an empty leg to pick up the job. You get paid for relocation legs, so feel free to remove this also if you don't mind flying a multiple leg flight.
Understanding Ranks and Rosters
When you accept a job, you select a rank and become part of that company's roster. Think of this as joining their team - you gain ongoing access to fly their jobs and earn their pay rates.
Each company has ranks that determine what aircraft you can fly and how much you earn per hour. When you accept your first job with a company, you'll be prompted to select a rank you're eligible for. Some ranks accept pilots automatically, others require company approval, others require progression through lower ranks to unlock.
The beauty of the roster system is its flexibility. You can be on multiple company rosters simultaneously, and within each company you can switch between ranks you've qualified for. As you gain experience and hours, you'll unlock access to more advanced ranks with better aircraft and higher pay.
We cover how pilots fly jobs and get paid in more detail here.
Accepting and Flying a Job
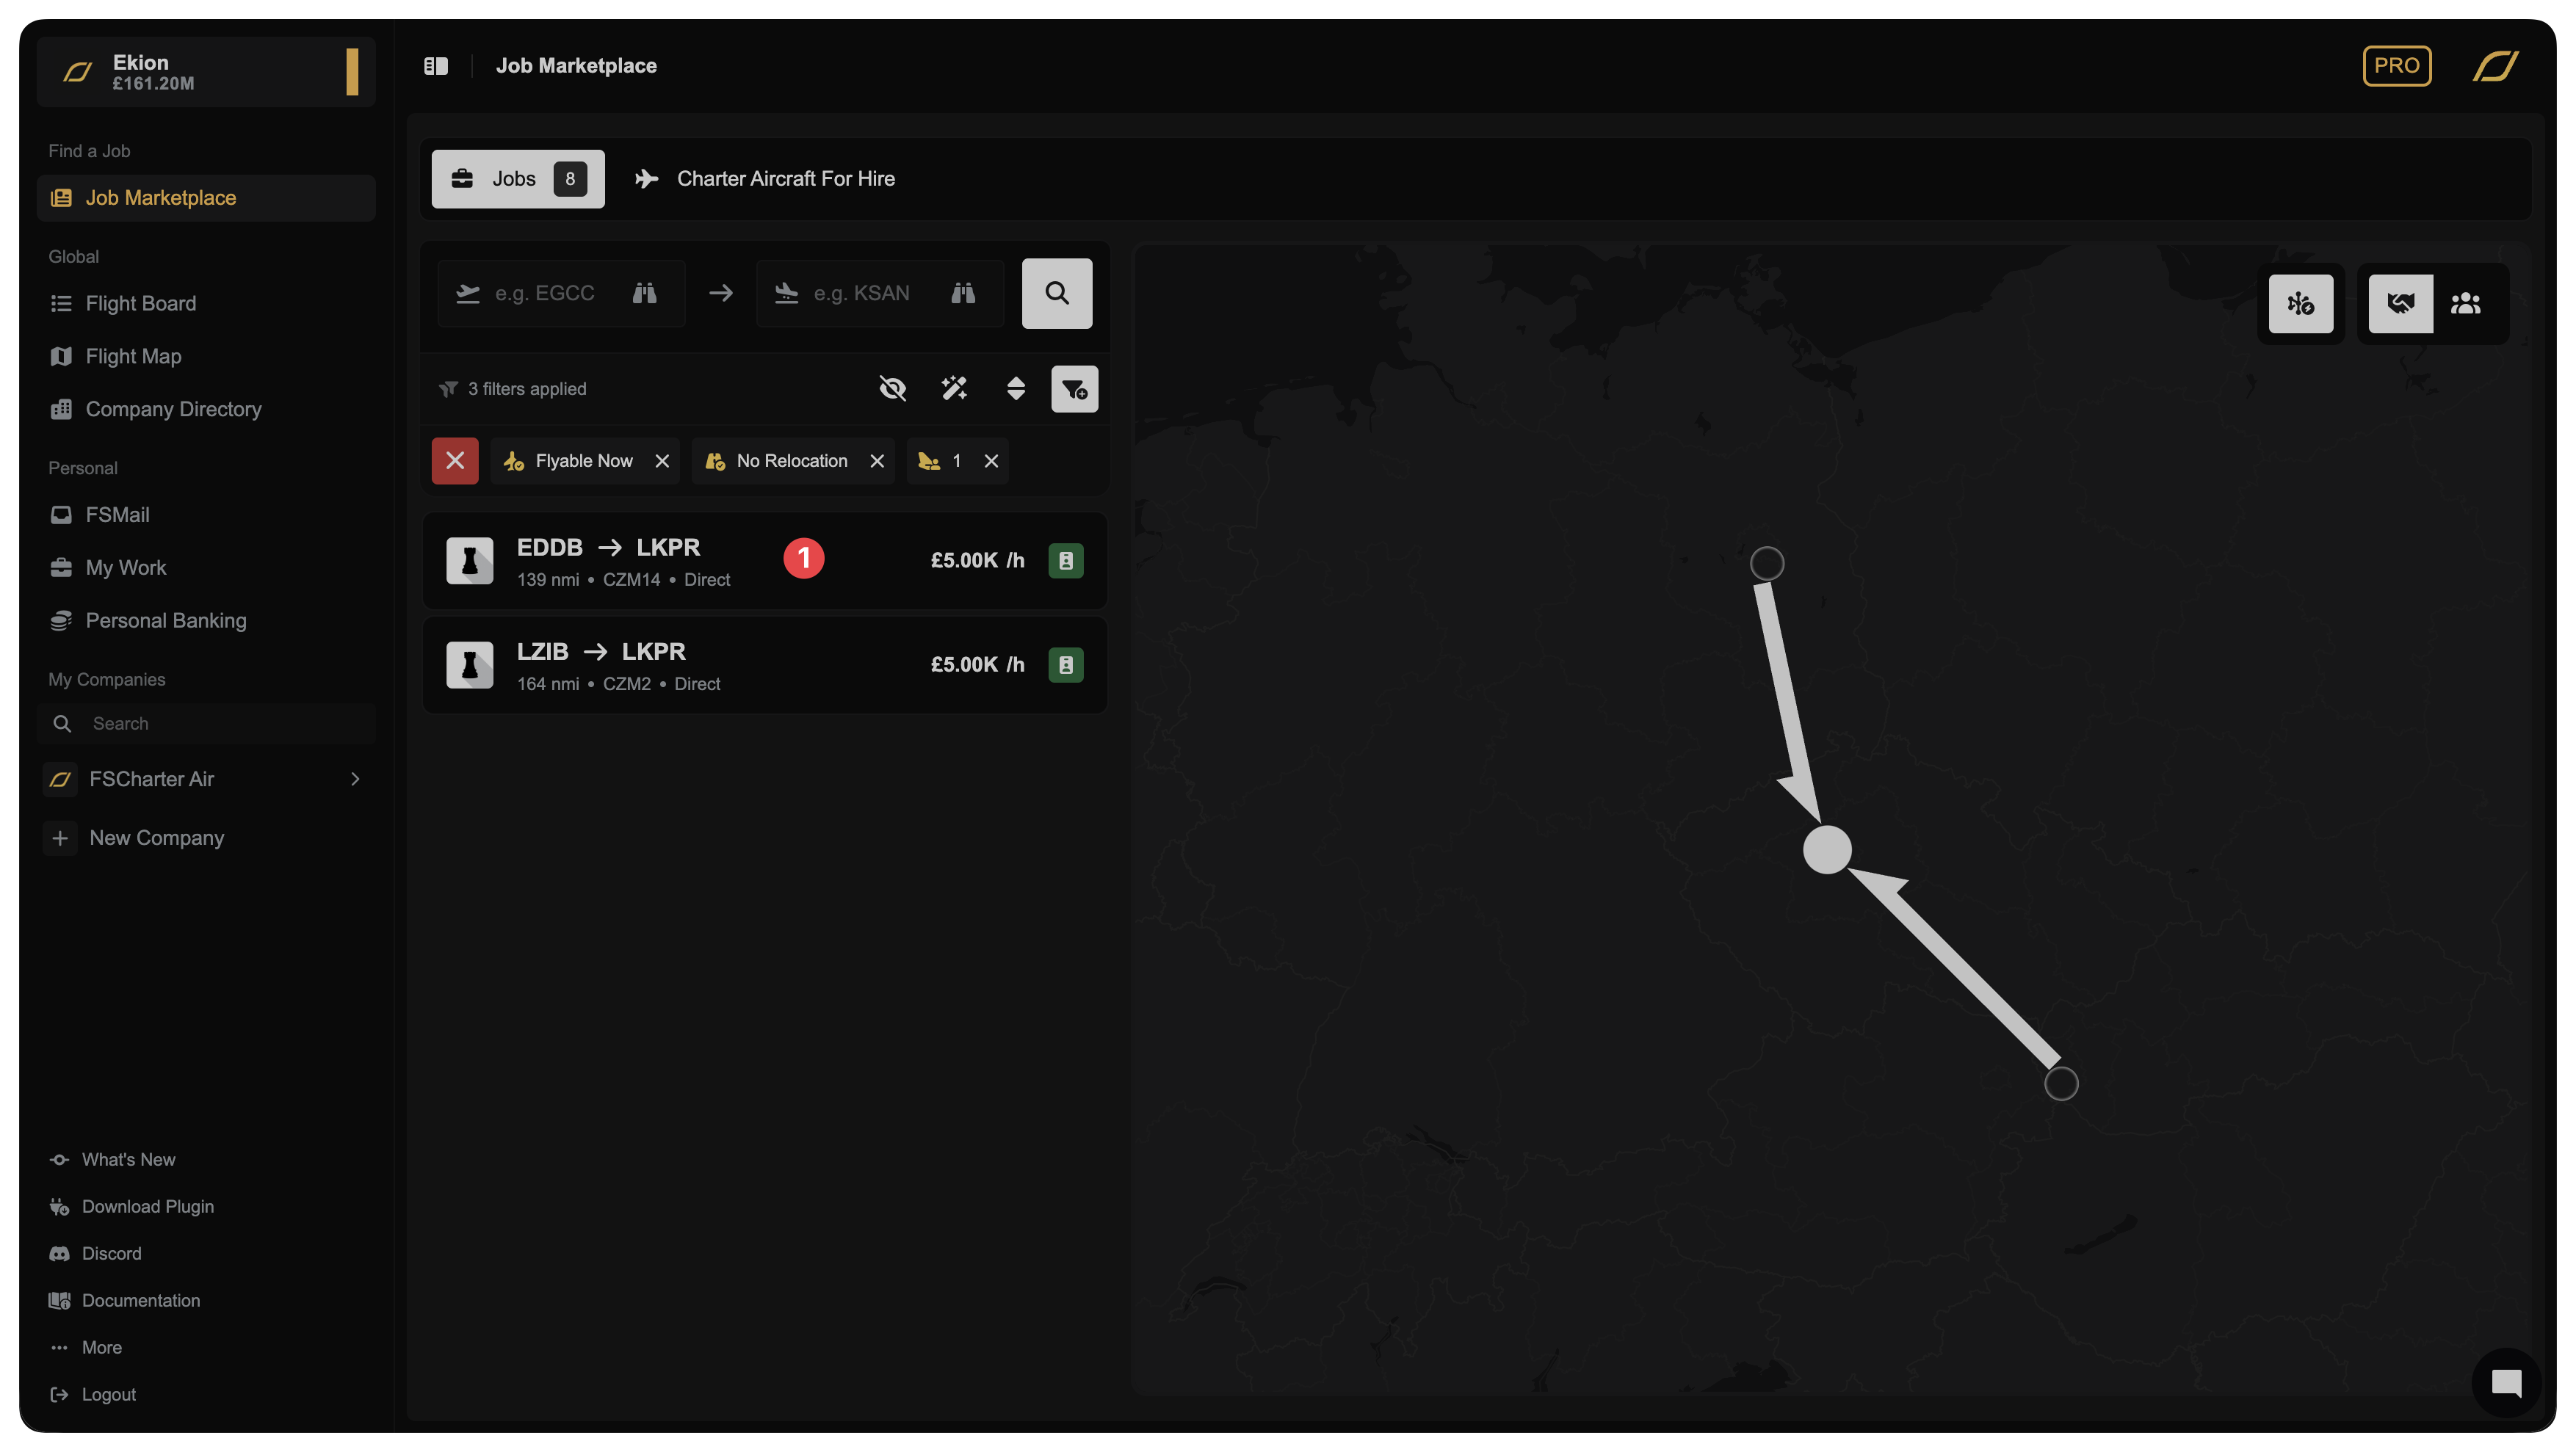
Once you've found a job you want to fly, click on it in the list 1 (note that clicking on a line on the map just filters the jobs to that route - you must select the job in the list to accept it).
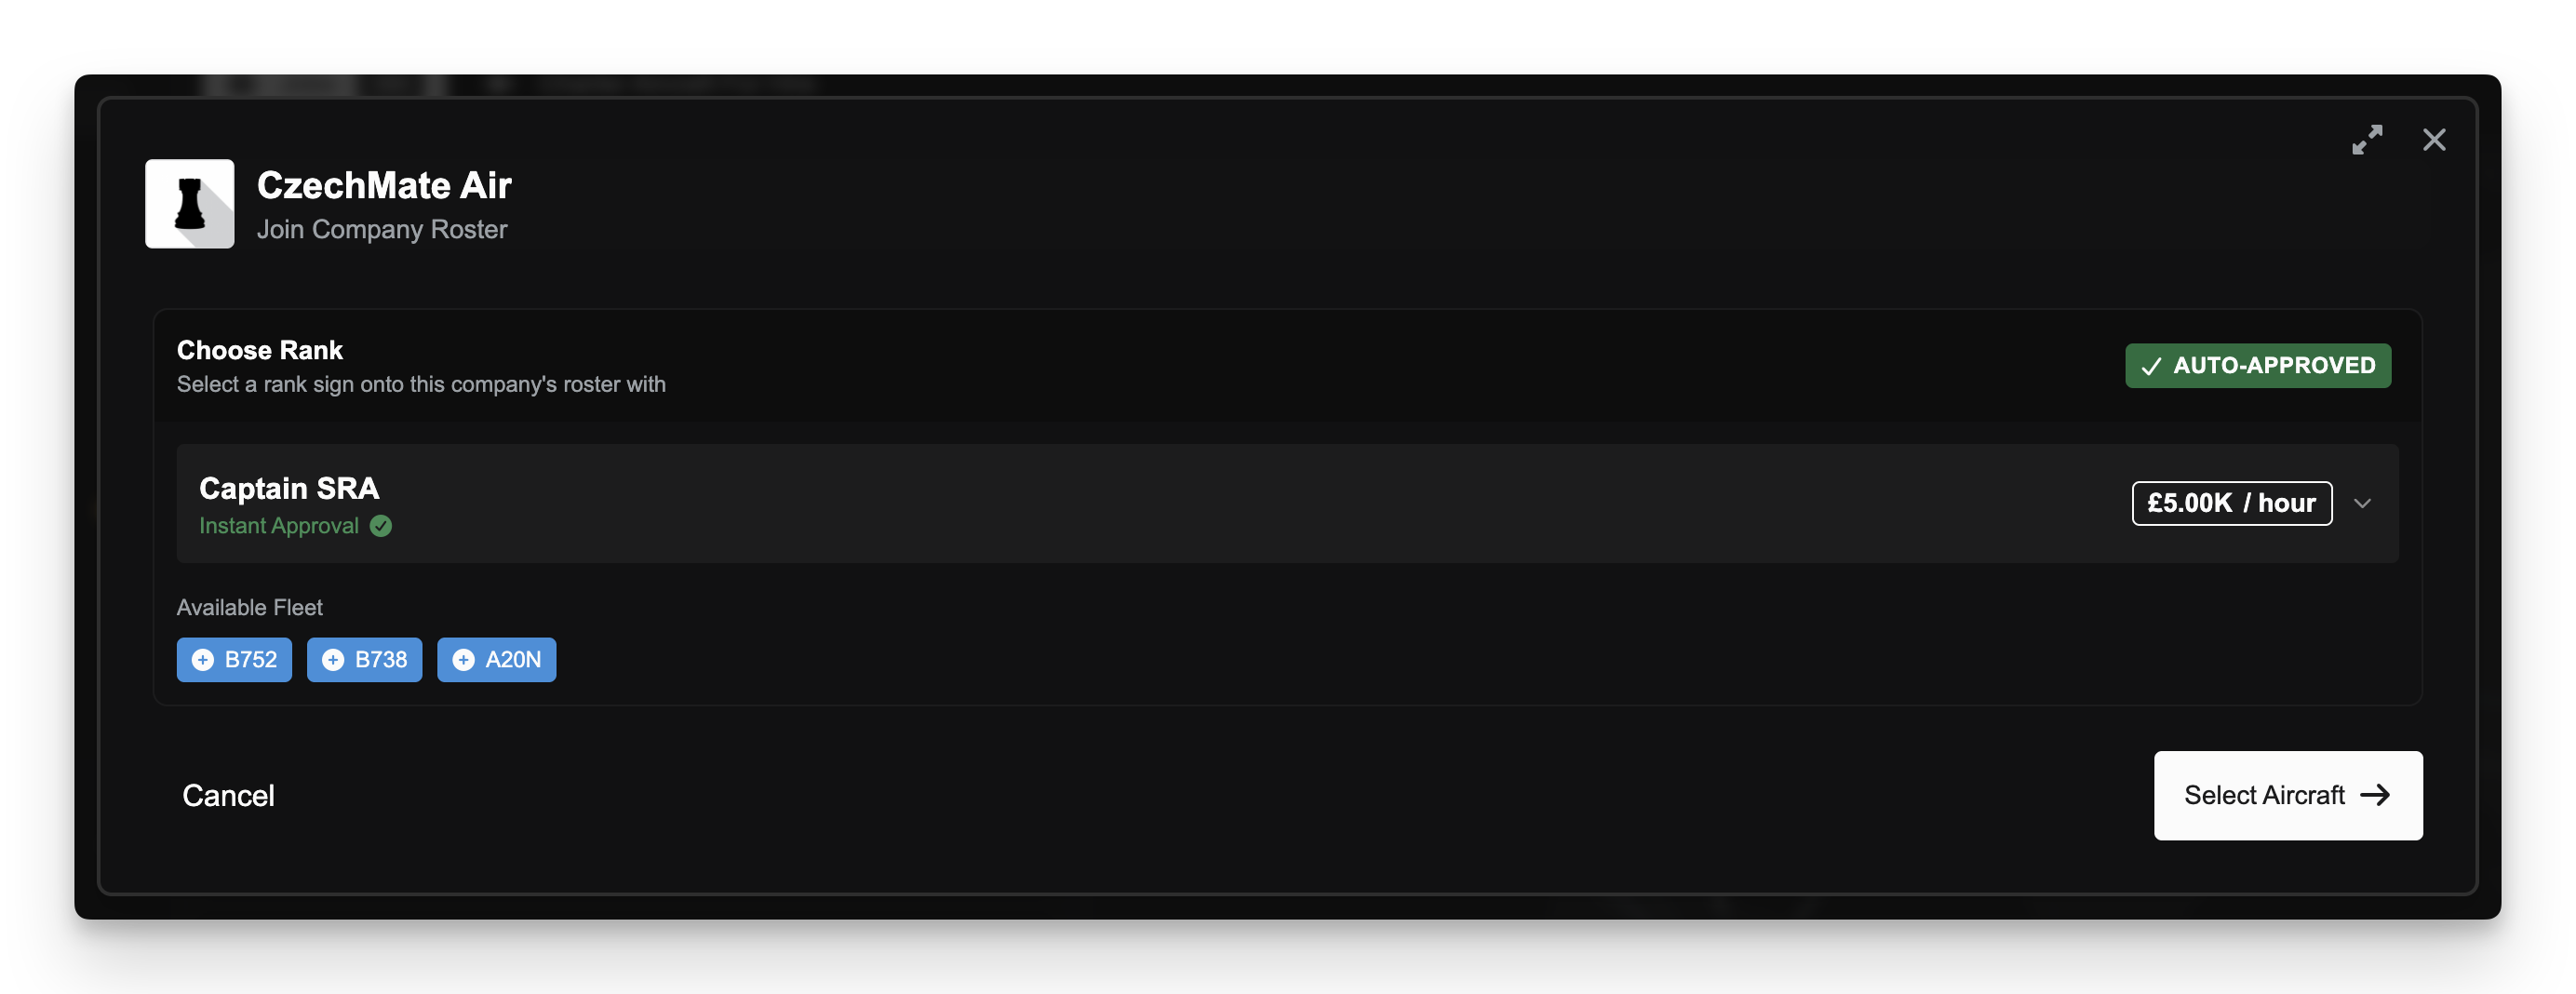
If this is your first job with the company, you'll be asked to select a rank and join their roster automatically. The system handles the paperwork; you just pick the rank and go.
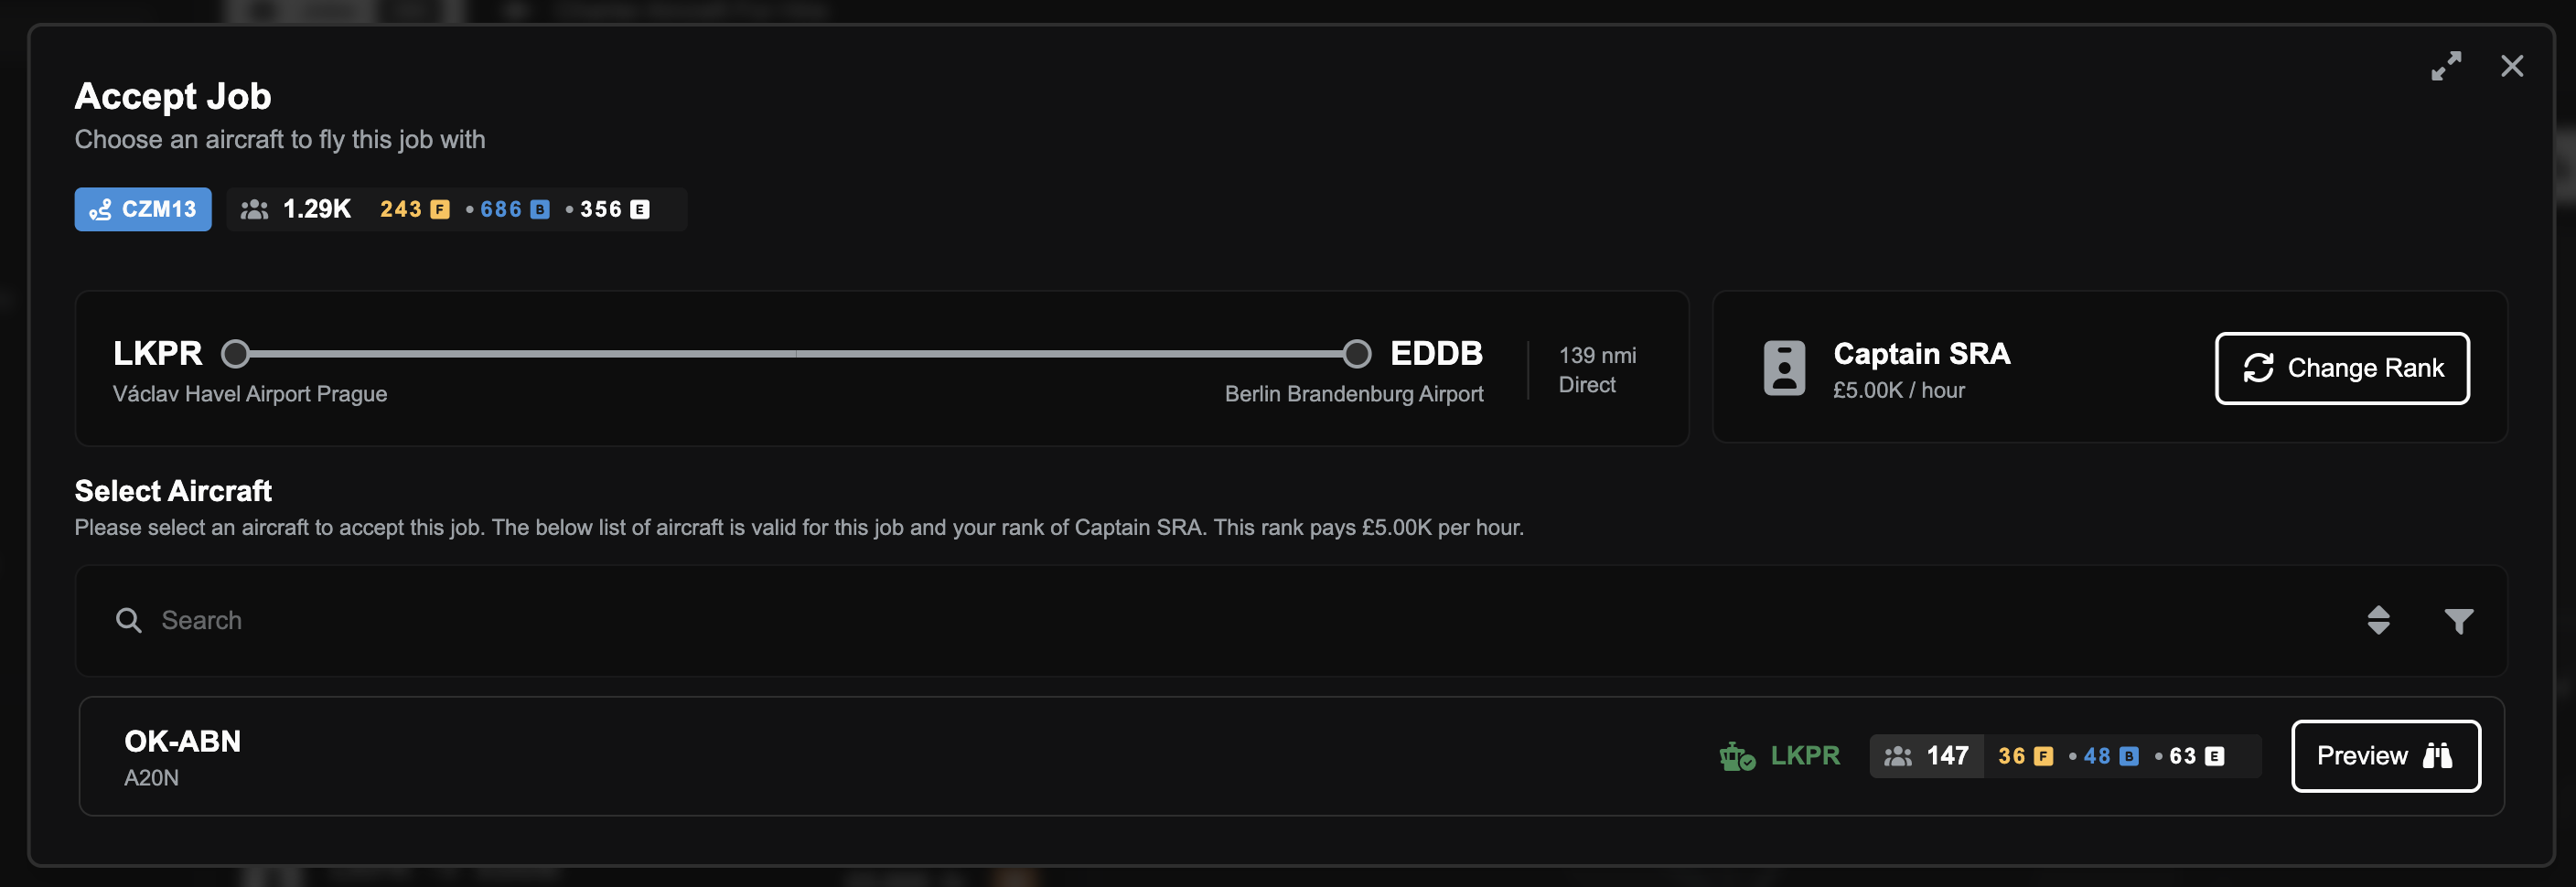
Then, you will be shown a page that lists the aircraft that can complete the route. Browse through the options - you'll see details about each aircraft including its location and type.
Select an aircraft and confirm your choice.
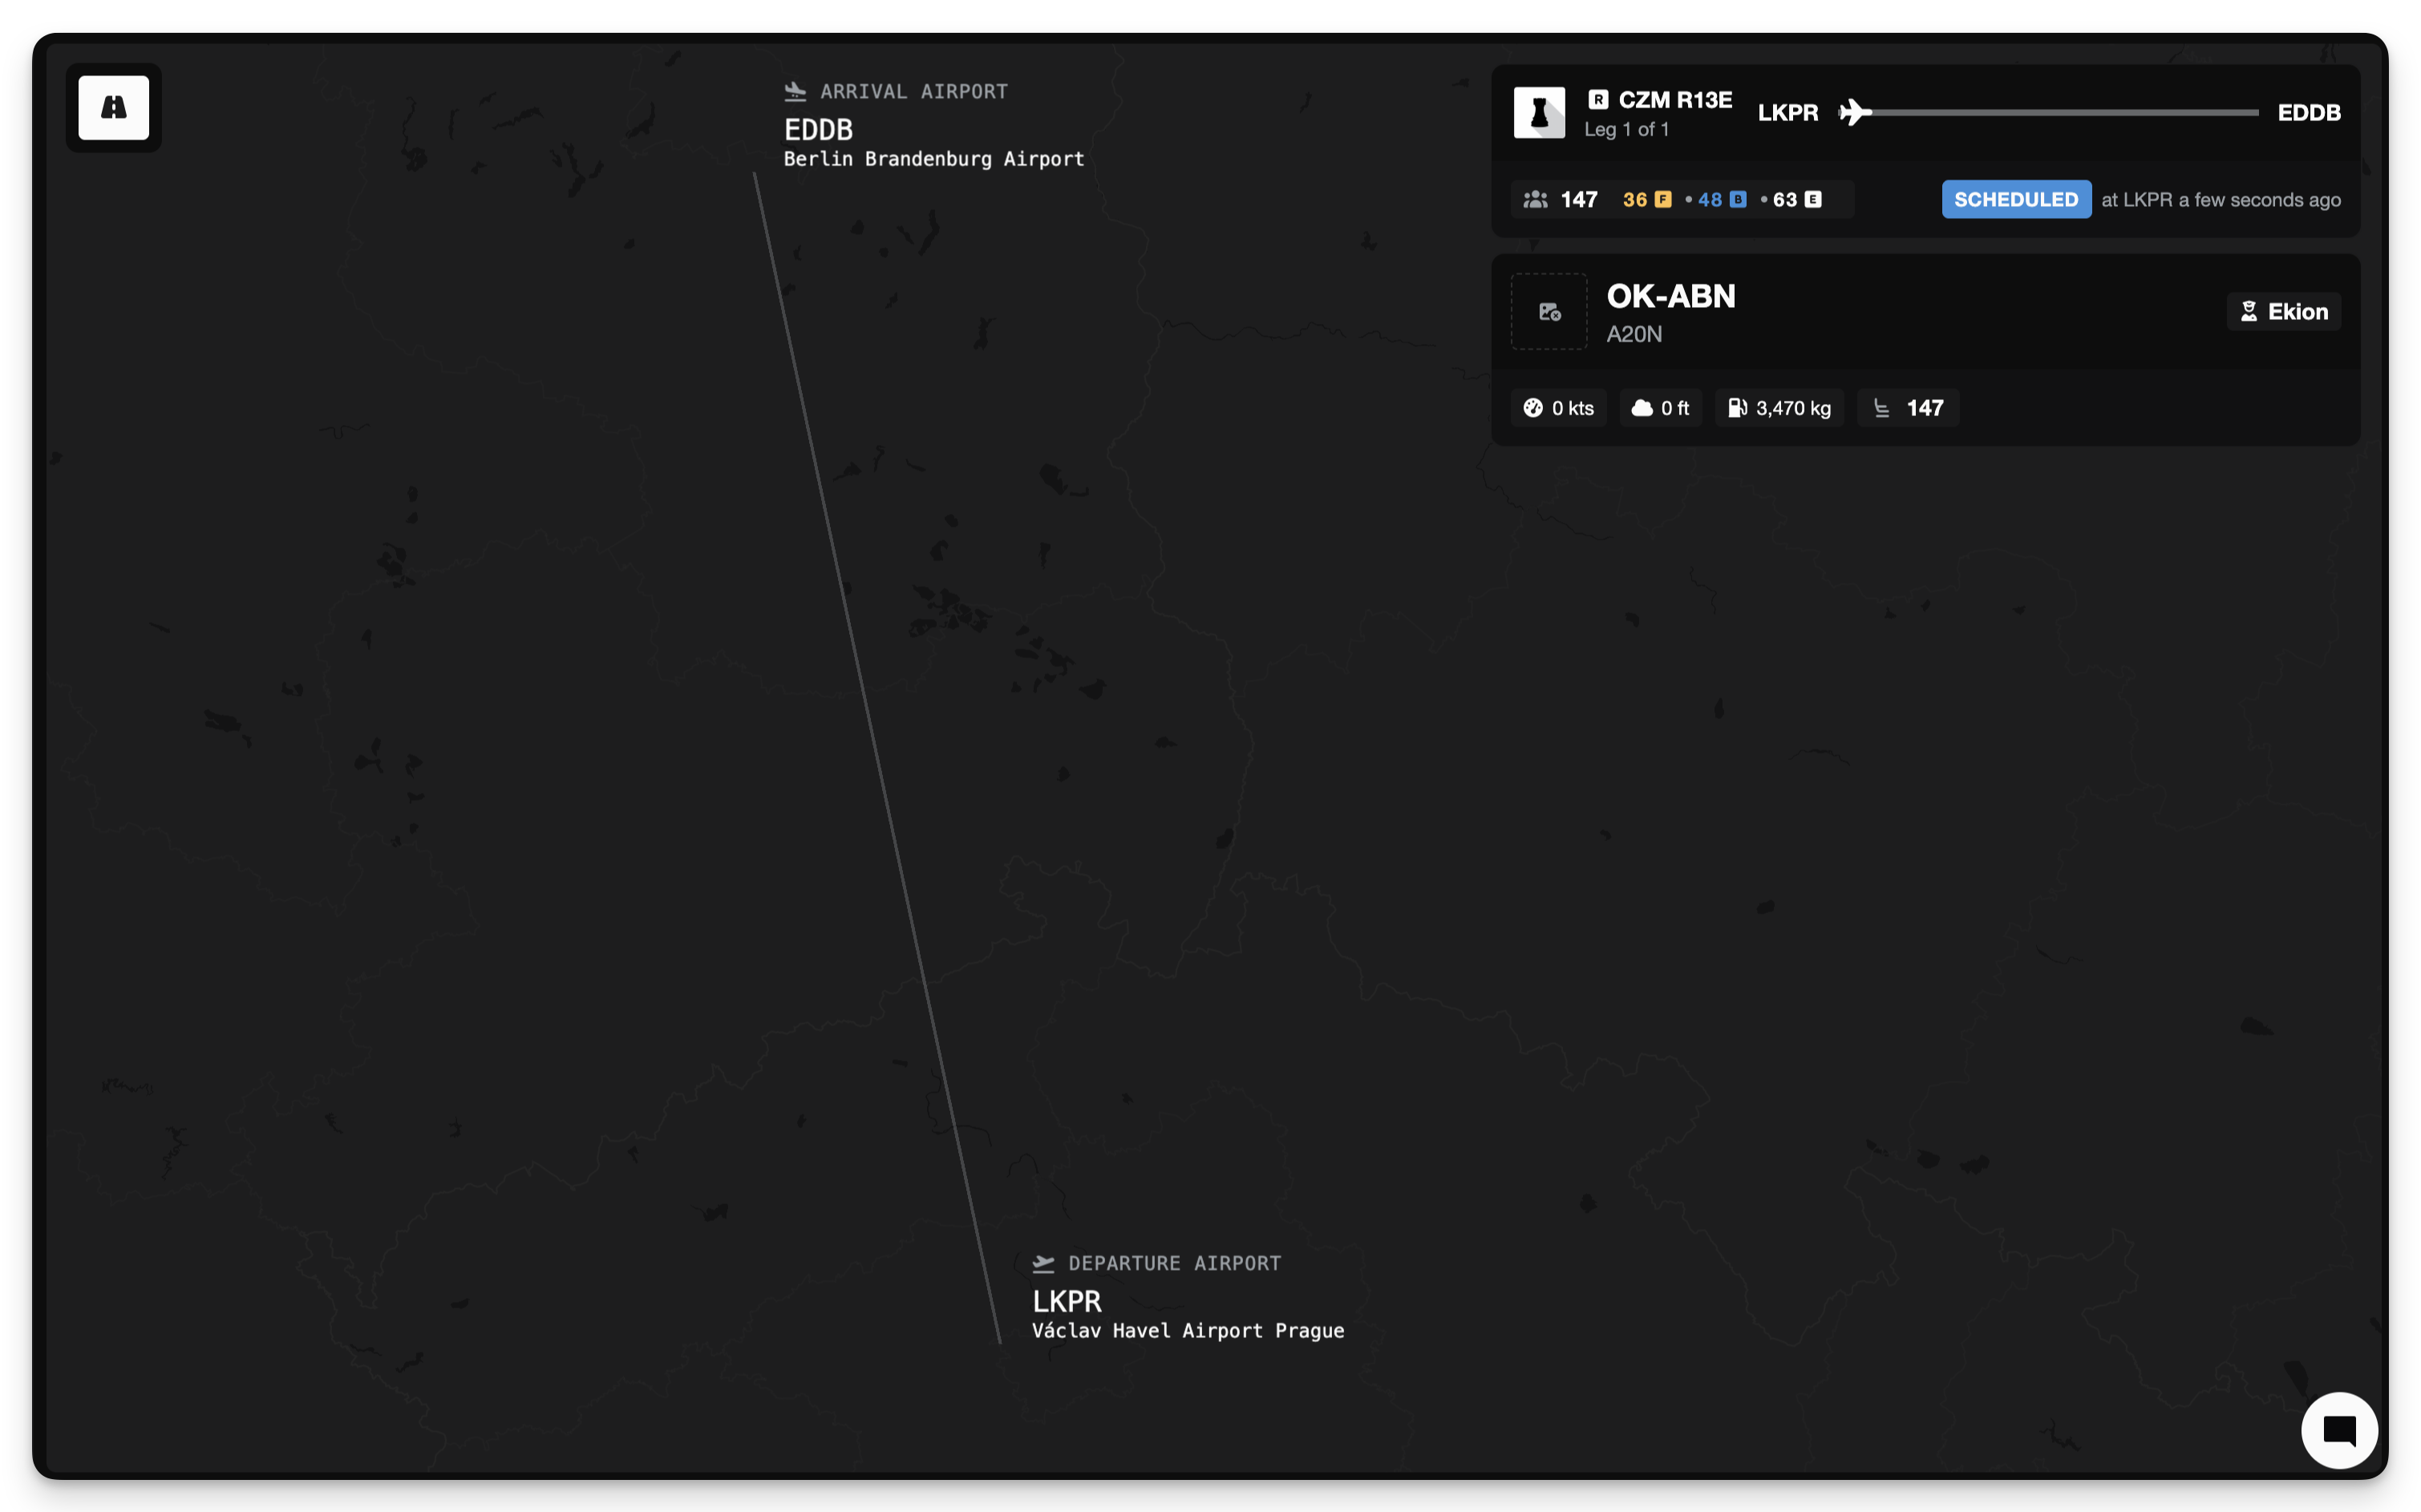
With the job accepted, you'll be redirected to the job overview page where you can track the flight in realtime. The job also appears in the top left corner of your sidebar and on the global Flight Board, either of which you can use to return to the job overview page.
Launch your simulator with the appropriate aircraft loaded. Open the FSCharter plugin panel and you'll see your job waiting. Click Begin Job to position your aircraft at its FSCharter location. The plugin teleports you to the correct parking position.
You may disable auto-location setting, engine-off checks and more. See here for more information.
Then, set your fuel in the simulator. FSCharter charges the owner company of the aircraft the fuel you load, so be mindful of adding the correct amount.
Click Board to load your passengers and charge for fuel. The plugin automatically sets the correct payload weights. You're responsible for ensuring the aircraft is within weight and balance limits.
Taxi out and fly the route as you normally would. The plugin monitors your flight, tracking altitude, speed, and position. Avoid slewing or time acceleration during active flight legs, as these invalidate the simulation.
When you land at your destination, taxi to a suitable parking position away from the runway. Stop the aircraft with parking brake set and engines off. The plugin detects your arrival and prompts you to disembark the aircraft.
Automatic disembarkation can be enabled from the plugin settings. See here for more information.
Congratulations, you've completed your first FSCharter flight! Your pay is credited based on the hours flown and your rank's hourly rate. The aircraft is now positioned for the next pilot, and passengers continue their journeys across the network.
Depending on your contract terms, you may see your payment in your Personal Banking page. You will also be able to see accrued hours in your My Work page for the company.
What's Next
With your first flight complete, the world of FSCharter opens up. Explore different companies to find operations that match your flying style. Progress through ranks to unlock larger aircraft and higher pay. Build your hours and watch your global rank climb.
Check out the Job Marketplace regularly - new jobs appear as players shift passenger demand around the world. Use the Company Directory to research airlines before joining their rosters. And keep an eye on your Pilot Portal for each company, where you can track your career progression and see what's needed to unlock the next rank.
Happy flying!