Creating a Route
For an overview of Routes refer to the relevant page
Routes are one of the two primary ways passengers travel in FSCharter. Unlike charters, routes involve building a network that moves passengers to their chosen destinations from their origin. This guide will help you understand the process of researching and creating routes.
Where to create a route?
Routes can be created between any two airports. However, unlike charters, there is no guarantee that passengers will want to use your routes. The demand lens (see Charters for more information) in the Operations Cockpit is an excellent tool to start researching routes as it shows where passengers want to go. You can use this feature to search for all demand wanting to go to Airport A, which will display the origin airports that have passengers wanting to travel to Airport A, or all demand wanting to leave from Airport B to identify destination airports that want to receive flights from Airport B.
Please consider the additional following points when researching:
Passengers will only use your network of routes if they can reach their destination airport in three legs from their origin airport
The more routes and destinations are present in your network, the more passengers each route will attract
Passenger Services will increase the route demand- see the Passenger Services page for more information
If you fly to the same destination airport from two origin airports in your network then passengers will take the most direct route, which can mean lower demand on one route than the other
How to create a route
To create a route, navigate to the Operations Cockpit and then to the Route Lens. In the dock, you will see the current routes (if any), along with a search bar and options for sorting and filtering. On the right side, there is a white button that initiates the route creation process. Click this button to open the route creation dialog box.
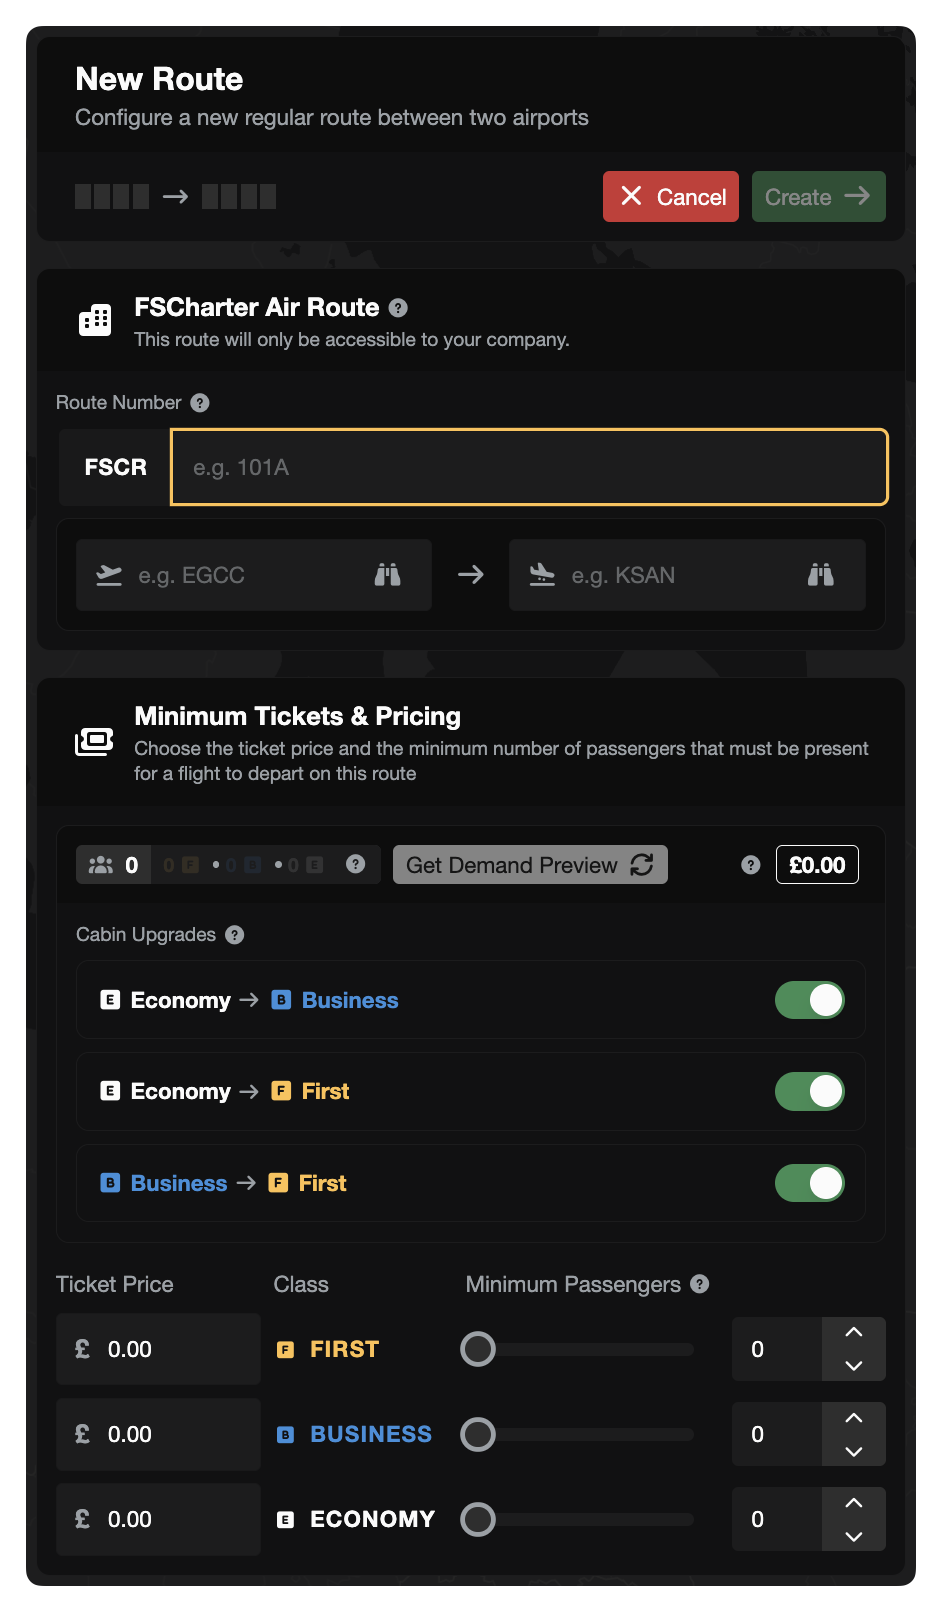
Enter a unique identifier for the route: 1–5 digits with an optional trailing letter (e.g., 101, 101A). It is automatically prefixed by the company ICAO and 'R', for Route.
Next, please enter your departure airport and arrival airport. Similar to other sections of the site, you can use the binoculars feature to search for an airport if you're unsure of its ICAO code.
At this point, the route has a ticket price of 0 for each passenger class, but you can create the route as it is. This is all that is required. However, it is advisable to press Get Demand Preview to see how many passengers currently want to take this route at a ticket price of zero, as this will indicate how busy the route might be.
Route Number Re-use
Unlike FSCharter v1, v2 offers the flexibility to re-use route numbers. If your route is not generating sufficient demand, you can delete it without concerns about the route number being unavailable.
Creating a Return Route
Most airline routes operate as round trips. To speed up the process of creating both legs, you can tick the "Also create return route" checkbox in the route creation form.
When this option is enabled:
Create and submit your outbound route as normal (e.g., EGCC → KLAX)
After the outbound route is successfully created, the route creation form automatically re-opens with:
Departure and arrival airports swapped (e.g., KLAX → EGCC)
Pricing, minimums, and cabin upgrade settings copied from the outbound route
Route number left blank — you enter the return route number
Review the pre-filled values, adjust pricing if needed (return legs often have different pricing), and submit
The "Also create return route" checkbox is automatically unchecked on the return form to prevent an infinite loop. The two routes are independent after creation. There is no ongoing link between them.
Pricing your Routes
The easiest way to price your routes is to start at zero and work up. Each time you set a new price, press Get Demand Preview to see how many passengers are interested in taking the route. You can adjust the price as needed, whether to "price out" a specific class of passengers or to manage the number of passengers to match the capacity of a single flight instead of aiming for the maximum available.
The easiest process to follow is:
Start with one class (F/B/E) and set the price as 0. Click
Get Demand Previewand remember or write down the number of passengers for that class- let's call this numberAIncrease the price by a number such as
50Click
Get Demand Previewand check if the number of passengers is the same or lower asAIf the number of passengers is the same then increase again and follow Step 2 and Step 3 until the number of passengers is less than
AIf the number of passengers has decreased then decrease your price by half of Step 2- in this case
25If the number of passengers is now equal to
Athen you can either leave that price or increase it by smaller intervals- say10- until the number is less thanAIf the number is still lower than
Athen decrease the price again by a smaller interval- say10- until the number is equal toAagain
Using this iterative process you can find the price that will ensure that you have the maximum number of passengers.
Cabin Upgrades
When configuring your route classes, you can control whether passengers are allowed to upgrade to a higher cabin class. Three independent toggles are available:
Economy → Business Upgrades — Allow economy passengers to upgrade to business class
Economy → First Upgrades — Allow economy passengers to upgrade to first class
Business → First Upgrades — Allow business passengers to upgrade to first class
Each toggle can be enabled or disabled independently, giving you fine-grained control over your upgrade policy. For example, you could allow economy passengers to upgrade to business but not to first class.
These toggles are available at both the company level (in Company Settings) and the route level. A route-level toggle can only be enabled if the corresponding company-level toggle is also enabled. If a company-level toggle is disabled, the route-level toggle will not show.
When an upgrade is enabled and a passenger can afford the higher class ticket price, they will automatically upgrade if seats are available in the higher cabin.
Slots
Each route requires a slot at both ends that aligns with the size of the aircraft you wish to fly and the type of route- either domestic or international. If you already possess a slot that meets these criteria, there is no need to acquire an additional one. Any route marked as disabled lacks a slot at one or both ends.